# Example lab
The goal of this lab is to familiarize yourself with the infrastructure and tools used in this class. Even though the grade in this lab won't influence your grade for the course, it is important that you work through this lab carefully.
## Part 1: Obtaining the Project Files
First, make sure you've followed the [Tools Setup](tools-setup.md) page.
**At this point, we strongly encourage you to take the time to read at least the first three chapters of the [Git Book](https://git-scm.com/book/en/v2). If you just copy-paste the commands we give you without understanding them, it's likely that you'll make a mistake somewhere and waste time. Git can be a huge productivity enhancer when used correctly, so it's definitely worth the investment!**
We'll starting by cloning the repository containing all our lab (make
sure to replace `GASPAR` with your EPFL username (the one with letters, not the
one with number) in the following command).
```shell
git clone -b example git@gitlab.epfl.ch:lamp/student-repositories-s21/cs206-GASPAR.git cs206-example
```
**If this command fails, make sure you've [logged into
gitlab](https://gitlab.epfl.ch/users/sign_in) and [registered in a
group](https://gitlab.epfl.ch/lamp/cs206/-/blob/master/exercises/Group%20workspaces.md),
then wait a few minutes.
If it still doesn't work it's likely that you didn't correctly upload your ssh
key to gitlab, look at the last part of the [Tools Setup](tools-setup.md) page again.**
```shell
cd cs206-example
```
Now that we've obtained the project, let's take a look at its structure:
```shell
.
├── build.sbt
├── project
│ ├── ...
└── src
├── main
│ └── scala
│ └── example
│ └── Lists.scala
└── test
└── scala
└── example
└── ListsSuite.scala
```
- All the files ending with `.sbt` or in the `project/` directory are build tool configuration files: you don't need to modify them or look at them for any of the labs
- The project sources are in `src/main/scala/`
- The sources of the unit tests are in `src/test/scala/`. You will need to make all the tests pass to complete the labs, and you should write additional tests to check for cases that our tests do not cover.
## Part 2: Using sbt
Start sbt by running:
```shell
sbt
```
Once it's finished starting (this may take a while), you'll be able to enter sbt
commands. You can compile your project using `compile` and run the tests with
`test` (this automatically compiles your code if needed to). Note that if
compilation fails, no tests will be run. The first time you'll run `test` in an
lab you should see many errors: that's normal, your job is to make the
tests pass! But first, let's look at a failed test in detail:

This tells us several things:
- There's a test named `sum of a few numbers (10pts)` in the class `ListsSuite` in the package `example`
- The test failed (that's why it's in red and starts with `==> X`) with an exception: `NotImplementedError`.
- This exception was thrown from the method `???` in `scala.Predef` in the file
`Predef.scala`, this file is not part of our project (that's why it's in
grey), to find the actual error in our code we have to look at where this
method was called from.
- This method was called from method `max` in `example.Lists` in the file
`Lists.scala` at line 40, this is where the bug is!
- It's also important to see where in our test this was called from, here
it's line 102 of `ListsSuite.scala`.
Time to go fix that bug! The next section will show you how to do that using the IDE.
## Part 3: Using the IDE
### Setup
Let's upgrade the IDE support first, close VSCode if it's open and run:
```shell
code --force --install-extension scalameta.metals
```
### Startup
To start Code, run the following in the project directory (the same directory where you
previously ran `sbt`), it's important to run Code in the correct directory or
it won't be able to import your project:
```shell
code .
```
(In this command the `.` is important, it's how we tell Code to run in the
current directory)
(if you see an error `Expected ';'` it means you're inside sbt, open a new
terminal in the same directory)
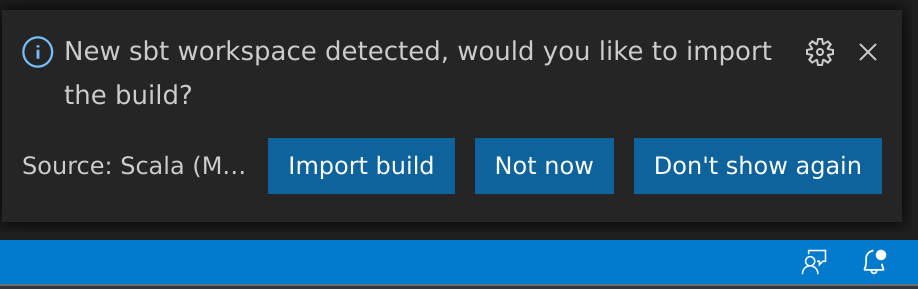
The first time the IDE starts, it will take some time to download more
components, eventually it will ask you to import the build, please click "Import
build":
You'll need to wait a bit for the import to finish, if an error appears try
closing and restarting Code in the same way we started it above.
### Usage
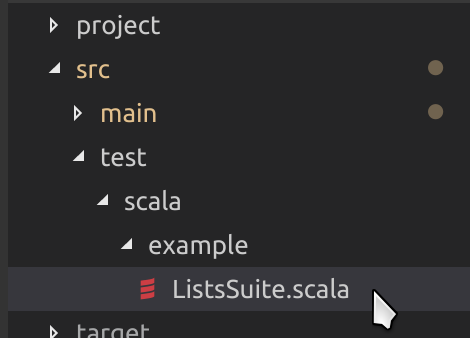
It's now time to dig in! Earlier we talked about a failing test, the stack trace
told us that it was failing on line 102 of the file `ListsSuite.scala`, so let's open that file:
Here's the source code of the test:

The first line gives a name to the test, the second line runs
`sum(List(1, 2, 0))` and tests that it equals 3, but in our case we never got to
this point because an exception was thrown, recall that the second line
of the stack trace was:
```scala
at example.Lists$.sum(Lists.scala:25)
```
This tells us that the crash happened when calling `sum`, we can hover with our mouse over the call to `sum` in the test method to get more information on it:
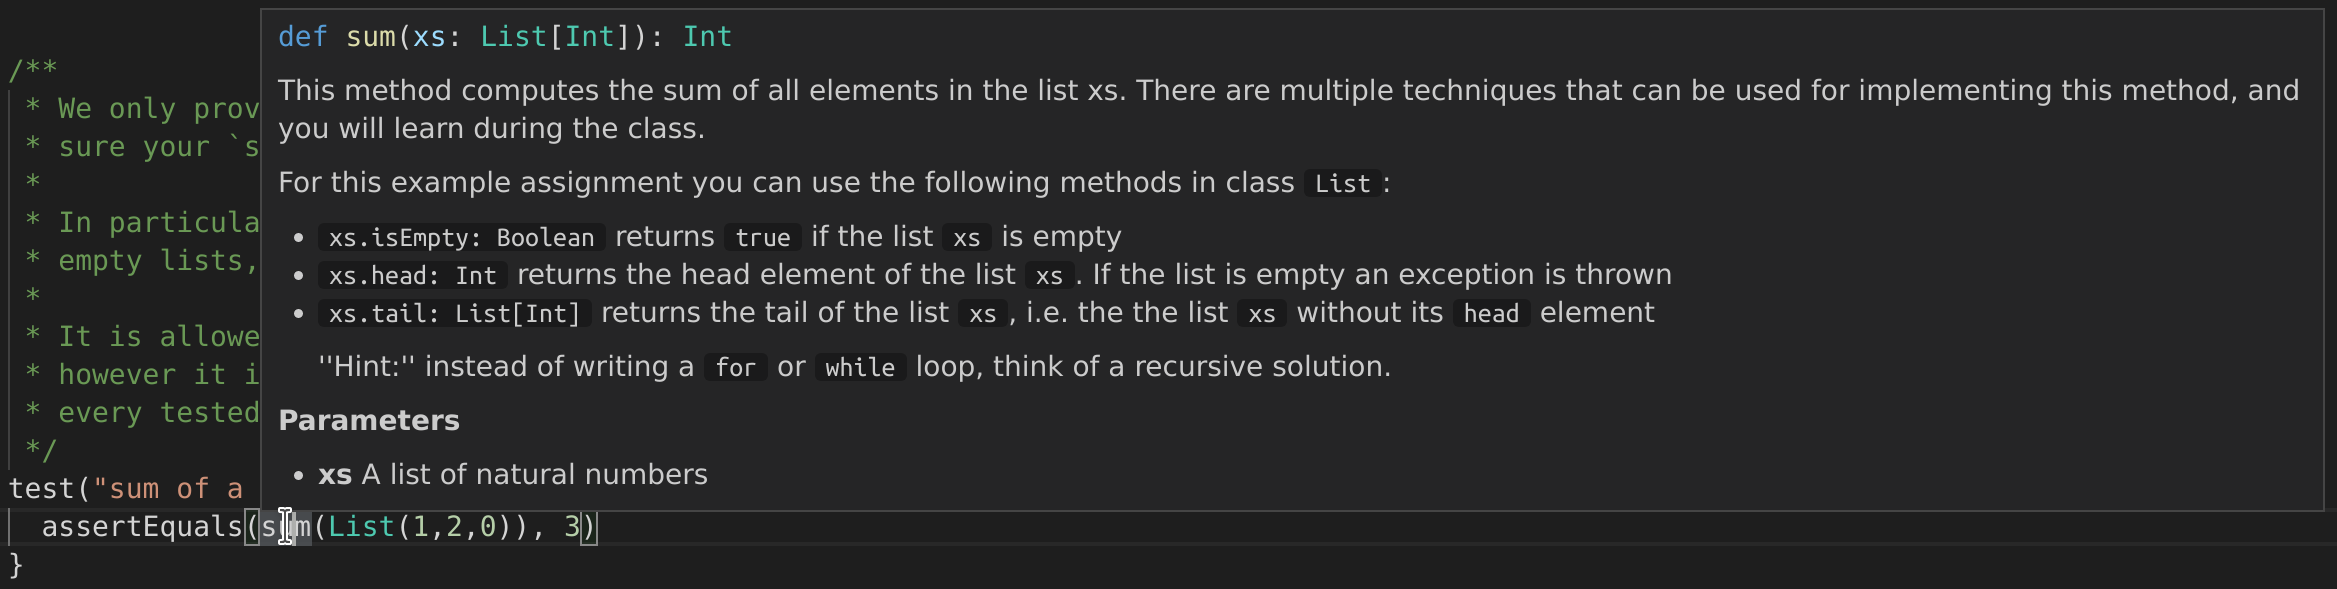
**If hovering doesn't show this see the [Troubleshooting](#troubleshooting) section.**
The hover is split into two parts: the first part is:
```scala
def sum(xs: List[Int]): Int
```
This means that `sum` is a method that takes a `List` of `Int` as argument and
returns an `Int`. The second part is the documentation of `sum`. We can jump to
the definition of sum by `Ctrl+click` (`Cmd+click` on Mac) or by `right click ->
Go to Definition`. Once there we see:

Now we know why the test failed: `sum` calls `???`, which is a method defined in
the Scala standard library that simply crashes your program: whenever you see it
in a lab it means that this is something you need to replace by your own
implementation.
Once you've implemented this method, you can run `test` from sbt again to see if
the test passed, if you want to run a single test instead of all tests you can
use `testOnly` instead and specify part of the name of the test:
```scala
testOnly -- "--tests=.*max of a few.*"
```
You now know enough to be able to work with the IDE, here are some additional tips:
- When you press `Enter` to make a new line, the IDE will automatically indent the
line if needed (for example, if the last word on the previous line was
`then`), however it will never unindent code for you (for example, when
writing `else`). You can indent code manually by pressing `Tab` and
unindent it by pressing `Backspace` or `Shift + Tab`.
- When working on an lab, you are free to create as many methods, classes and objects as you want. **But you shouldn't change the name of existing methods, classes and objects, because that may break the automated grading system, this is important!**.
- You can see a list of all warnings and errors reported by the compiler by clicking on  at the bottom left of Code.
- The IDE can show you on hover the documentation of classes, defs and vals defined in the current project but support for external project is currently missing. To compensate for this, you can consult the documentation online:
- The documentation for the Scala standard library is at [https://www.scala-lang.org/files/archive/api/2.13.3/](https://www.scala-lang.org/files/archive/api/2.13.3/)
- The documentation for the Java standard library is at [https://docs.oracle.com/en/java/javase/15/docs/api/index.html](https://docs.oracle.com/en/java/javase/15/docs/api/index.html)
- You can customize Code as much as you want, including installing additional extensions, but please avoid installing other Scala-related extensions: they may conflict with the one we use for this course.
- While working on your lab, you will regularly want to go back to the sbt console to run the tests. You could simply run the command `test` every time, but you can take advantage of the watch mode instead: if a command is prefixed by `~`, sbt will watch the source directory for changes and re-run the command every time a file is saved. So a possible workflow is:
1. Start the IDE
2. Start sbt in the terminal (protip: you can start a terminal inside Code from the
menu: `Terminal -> New Terminal`)
3. Inside sbt, run `~test`
4. Work in the IDE, and check the output of the sbt console from time to time
## Part 4: Running your code
Writing code and running tests is nice, but sometimes more direct feedback is useful, like when you want to experiment with Scala, or try out some methods that you implemented. You can do this using the Scala REPL (Read/Eval/Print Loop) or with a worksheet.
### The REPL
After having started sbt, you can start the REPL by typing `console`, you will see the following prompt:
```scala
scala>
```
At this point you can write any Scala expression you want, for example:
```scala
scala> val l = List(3,7,2)
val l: List[Int] = List(3, 7, 2)
```
(If you write an expression without wrapping it in a `val` or a `def`, the REPL will give it a name for you, starting with `res`)
```scala
scala> l.isEmpty
val res0: Boolean = false
scala> println(res0)
false
scala> l.tail.head
res1: Int = 7
scala> List().isEmpty
res2: Boolean = true
```
The classes of the lab are available inside the REPL, so you can for instance import all the methods from `object Lists` and start using `max`:
```scala
scala> import example.Lists._
import example.Lists._
scala> max(List(1,3,2))
res1: Int = 3
```
You can enter a multiline expression in the REPL by using `Alt+Enter` instead of `Enter`:
```scala
scala> if 1 == 1 then
| "a"
| else
| "b"
val res0: String = a
```
(on macOS, first go to `Terminal -> Preference -> Profiles -> Keyboard` and then
select `Use Option as Meta key`, then `Option+Enter` will work for multiline
expressions.)
In order to exit the Scala REPL and go back to sbt, type `Ctrl+D`.
### The worksheet mode
A *worksheet* is a file where every line of code written in the IDE is executed and its output displayed as a comment.
#### Creating a worksheet
Any file that ends in `.worksheet.sc` is considered to be a worksheet by the IDE. Once Code is launched in a project, all you have to do is create a new file and save it (`Ctrl+N, Ctrl+S`) using any name as long as it ends in `.worksheet.sc`.
#### Using the worksheet mode
Inside this file, you can type any line of code you would type in the REPL. The
worksheet will be automatically run when the code is saved and auto-save is
enabled by default. Each line of code will be executed one by one and its output
will be shown in green on the right.
## Part 5: Submitting your Solution
[Click here to learn how to submit your lab.](grading-and-submission.md)
# Troubleshooting
## sbt fails to start
If you see any kind of error when sbt starts that prevents you from using it,
try cleaning the project cache by running:
```shell
git clean -Xdf
```
Then restarting `sbt`, if this still doesn't work, try deleting the global sbt
cache:
```shell
rm -r ~/.sbt
```
## IDE features like type-on-hover or go-to-definition do not work
It's likely that the build wasn't imported, we can import it manually:
Click on the "m" logo in the left bar (where the red arrow is in the screenshot below):
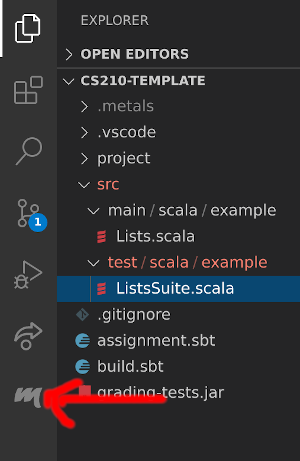
In the sidebar that appears, click on "Import build", then wait a bit:
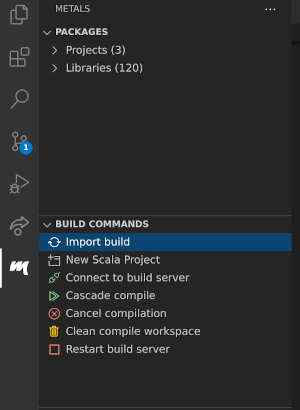
If things still don't work, try restarting Code (launch it in the same way you
started it before, using `code .` from the project directory). If you're still
having issues, try clicking on "Clean compile workspace" from the same
sidebar.
## Warning about Bloop installed version
If you get a warning like this:

Please click the first button "Turn off old server".